
The colour of a wood engraving comes out of the wood, not out of the laser.
A CO₂ laser engraving wood is burning a controlled amount of the surface away. The brown you see is scorched timber, which means the shade you get is decided by what the board is made of before you touch a setting. That is the whole reason Boss publishes different numbers for balsa, basswood and birch instead of one number for “wood” — and the reason two shops running identical files get different plaques.
Surface engraving on wood — logos, text, artwork and decorative detail, plus depth, contrast and finishing.
Species and colour, grain, focus, scan gap, power and speed — roughly in that order of importance.
The one thing worth knowing before anything else
Material governs the result before any setting does. Hardwoods like oak and walnut need more power than softwoods; lighter woods give higher contrast and darker woods less; and prominent grain engraves unevenly, biting deeper into the softer, less dense growth. None of that is a settings problem you can solve — it is a stock choice made at the lumber rack. Pick even-grained, light, low-resin material when consistency matters, and test on a scrap of the same board before you commit the real one.
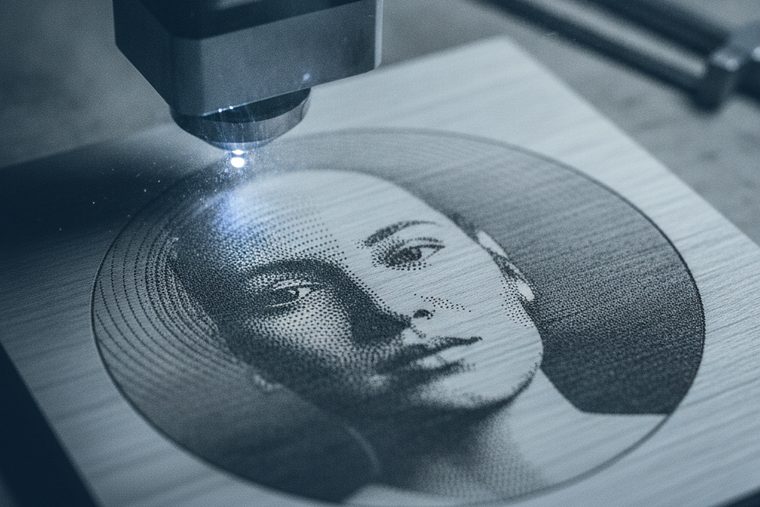

Any CO₂ in the Boss range engraves wood well. Engraving asks for bed size and consistency far more than raw wattage.
Size a CO₂ System- 1 · Choose the board, then the artwork. Light, even-grained, low-resin stock gives the highest contrast and the fewest surprises. If the piece has to match one you made last month, it needs to come off the same species — ideally the same board.
- 2 · Prepare the surface. Clean and flat. Dust scatters the beam, and a warped board sits at a different height across the bed, which means a different focus and a different depth from one side to the other.
- 3 · Set the artwork to run with the grain. Where grain is prominent, orienting the design along it rather than across it hides most of the unevenness the grain will cause.
- 4 · Focus for this board’s thickness. Every time. This is the single most common cause of an engrave that comes out faint.
- 5 · Run the test file on a scrap of the same stock. Boss ships engraving, cutting and scoring test files on the machine’s USB drive precisely so you can find the setting without spending the real piece.
- 6 · Run it with air assist on. Engraving makes smoke across the whole engraved area, not just a thin kerf. Air clears it so it cannot dull the surface, shield the beam or film the lens.
| Material | Power % at 70 W / 105 W / 155 W | Speed | Scan gap |
|---|---|---|---|
| Balsa wood | 25 / 20 / 15 | 350 mm/s | 0.065 mm |
| Bass wood | 35 / 25 / 20 | 350 mm/s | 0.065 mm |
| Birch wood | 35 / 25 / 20 | 350 mm/s | 0.065 mm |
| Birch plywood | 30 / 25 / 20 | 350 mm/s | 0.065 mm |
Scan gap — the spacing between raster lines — is the same 0.065 mm on every row. Tightening it lays lines closer together for a smoother-looking fill and a longer job; opening it up runs faster and eventually shows as visible banding. Boss publishes one value because it is a good general answer, not because it is the only one.
Boss publishes the same charts for acrylic, leather, glass, stone and coated metals — the complete set is in CO₂ laser settings by material.
Four species, and everything else
Boss’s published wood settings cover balsa, basswood, birch and birch plywood. That is a fair map of what behaves predictably, and it is also the honest limit of what we can hand you as first-party fact. For oak, walnut, maple, cherry, bamboo, cork, acacia and the rest, the relationship still holds — denser and darker needs more power and yields less contrast — but the specific number is yours to find on a test tile, and anyone publishing one for your board has not measured your board.†
How far into the board the engrave cuts. More power and less speed remove more material; so does a second pass. Depth is what you want for a tactile, carved plaque — and it costs time and edge crispness, because a deeper trench has sloped walls.
How much the engraved surface has carbonised. Slower and hotter is darker — up to the point where it stops being contrast and starts being char, with a smoky halo spreading past the artwork. Past that point you are making the piece worse, not darker.
Why light wood wins on contrast
An engrave is dark, and it reads against whatever surrounds it. On pale basswood or maple, a light engrave already sits several shades away from the background and the artwork snaps. On walnut, the engraved area and the unengraved area are closer in tone to start with, so the same file looks muted no matter how hard you push it — and pushing it harder just widens the burn. If someone brings you dark stock and wants high contrast, the honest answer is usually a different board, or a different technique: cut the artwork through a light veneer and inlay it, or fill the engrave with paint.
Grain is a ceiling on evenness
Within a single growth ring, density changes. The beam removes more of the soft early growth than the hard late growth, so an engrave crossing pronounced grain comes out with a striped depth even though every setting was constant. Nothing fixes it at the machine. What helps is choosing even-grained species, orienting the design with the grain rather than across it, and keeping fine detail off the most dramatic areas of figure.
Engraving bare wood and finishing afterwards is the safer default. You know exactly what the beam is hitting, the smoke is wood smoke, and nothing unexpected melts. The catch is that engraved areas are open, porous end-grain: stain and oil soak into them far more readily than into the sealed surface around them, so the engrave goes darker than the rest of the piece. Sometimes that is the effect you wanted. When it is not, seal the whole face first with a thin wash coat so the engrave and the surface take the stain more evenly, and prove it on a scrap of the same board.†
Engraving through an existing finish gives sharper contrast — the beam removes the finish and the wood beneath in one go, and the edge of the artwork is exactly the edge of the finish. The cost is control: a film finish can melt, bubble or discolour past the engraved line, and every coating has its own tolerance. It is also where the real safety question lives.
The coating rule, and it is not negotiable
You are not engraving wood at that point — you are engraving whatever is on top of it, and you are vaporising it into the room. Shop-applied stains, oils and lacquers you mixed yourself are a known quantity. A reclaimed board, a factory-finished panel, a painted salvage piece or pressure-treated lumber is an unknown coating until someone produces the safety data sheet. And the hard line that governs the whole site applies here with particular force, because so many “wood” surfaces are not wood at all: PVC and vinyl never go in a laser — melamine facings, “wood-look” laminate and iron-on edge banding are commonly PVC. If nobody can name the coating, do not run it.
† Finishing schedules, wash coats, paint fill and post-engrave sealing are settled woodworking craft; Boss publishes no finishing procedure for engraved wood. Test every product on a scrap of the same stock before a finished piece.
Everything above assumes a flat surface at a fixed distance from the lens. A cylinder is not that: only the topmost line of it sits at focus, and the surface curves away on both sides. A rotary attachment solves it by turning the workpiece under a stationary head, so the same narrow strip stays at focus while the piece rotates — the machine’s Y axis becomes rotation instead of travel. Every setting discussed on this page still applies; what changes is that the piece has to be round, concentric and driven without slipping, because a cylinder that slips mid-job produces an engrave that no longer lines up with itself. Tapered pieces — a bat, a stemmed glass — need the taper supported so the engraved band stays at a constant radius.
Wood engraving FAQs
Questions people ask about engraving wood.
Answered for a shop that has to repeat the result, not just get it once.
QHow do you laser engrave wood?
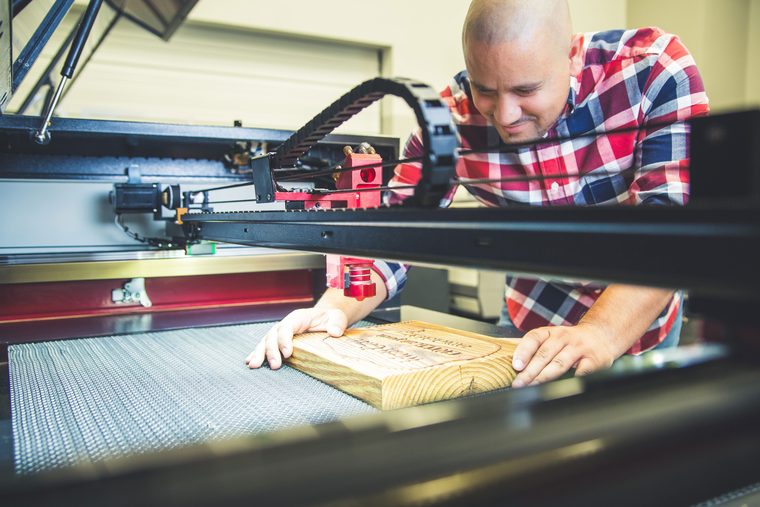
Six steps, and only one of them involves pressing start. Pick the board — light, even-grained and low-resin if you want contrast and repeatability. Clean and flatten it, because dust scatters the beam and a warped board engraves at two different depths. Orient the artwork with the grain where the figure is strong. Focus for this board’s thickness, every time, since a stale focus is the most common cause of a faint engrave. Run the test file on a scrap of the same stock — Boss ships engraving, cutting and scoring test files on the machine’s USB drive for exactly that. Then run the job with air assist on, so the smoke an engrave makes across the whole filled area is blown clear instead of dulling the surface and filming the lens. Boss’s published starting points for basswood and birch are 35% / 25% / 20% power at 350 mm/s with a 0.065 mm scan gap, on the 70 / 105 / 155 W tiers.
QWhat type of wood is best for laser engraving?
Light, even-grained and low in resin. Boss publishes settings for balsa, basswood, birch and birch plywood, which is a reasonable list of woods that behave predictably. Basswood and maple are the usual answers when contrast matters, because a dark engrave against a pale background is the whole effect. Birch plywood is the workhorse for anything that also gets cut. What causes trouble is the opposite end: dark species like walnut give you less contrast for the same engrave, dramatic grain engraves unevenly because the beam bites deeper into the soft early growth, resinous species smoke and char more, and knots are local density spikes that engrave differently from the board around them. Bamboo, cork and acacia all engrave — Boss publishes no chart for them, so treat any number you find as a starting point to prove on a test tile. If character matters more than consistency, buy the figured board and accept the variation; if you are making two hundred matching pieces, buy the boring one.
QHow do I make laser engraving on wood darker?
First check that darkness is the problem and not contrast. The engrave is dark because the surface has carbonised; how dark it looks depends just as much on the wood around it. On walnut, a perfect engrave still reads muted because the background is already brown — the fix there is a lighter board, not a hotter setting. Where the stock is right, go slower before you go hotter: more dwell time carbonises more without widening the mark as much as raw power does. Keep the piece in focus and the artwork at a sensible resolution, since a blurred edge reads as a weak engrave. Past a certain point more heat stops adding contrast and starts adding a smoky brown halo around the artwork, which makes the piece look worse while technically being darker — that is the ceiling, and the way past it is not the laser. Filling the engraved recess with paint, or inlaying a contrasting wood, gets you a genuinely darker mark without burning the board. Any post-engrave darkening product is woodworking craft rather than a Boss-published procedure — test it on scrap.
QCan you laser engrave stained, painted or finished wood?
Often yes, with one condition that decides everything: you have to know what the coating is. You are not engraving wood any more, you are vaporising the finish into the cabinet and the room. A stain or lacquer you applied yourself is a known quantity, and engraving through it can give beautiful contrast because the artwork edge is exactly where the finish stops. A reclaimed board, a factory-finished panel, a painted salvage piece or pressure-treated lumber is an unknown coating until someone produces the safety data sheet — and a lot of “wood” surfaces are not wood at all: melamine facing, “wood-look” laminate and iron-on edge banding are frequently PVC, which releases hydrogen chloride and must never go in a laser at any setting. Expect film finishes to melt or discolour slightly beyond the engraved line, and expect to lower power compared with bare wood. If the piece is not yet finished, engraving first and finishing afterwards is the safer default.
QShould I stain wood before or after laser engraving?
Both work and they give different pieces, so pick by the look you want. Engrave first, then stain and the engraved areas — open, porous, effectively end grain — drink up far more stain than the surface around them, so the artwork ends up considerably darker than the board. That is a genuinely attractive effect and it is also the reason people are surprised by it. If you want the engrave and the surface to take stain evenly, seal the face with a thin wash coat first, then engrave, then stain. Stain first, then engrave and the beam removes the stained layer to reveal lighter wood underneath, so the artwork comes out lighter than the background — the reverse image, and a good answer on dark stock. The safety condition from the previous question applies: know what is in the stain before you vaporise it. Whichever order you choose, prove it on a scrap of the same board, because absorption varies by species far more than by product.
QHow do I seal or finish wood after engraving?
Start by removing what the laser left. A light sand with fine grit along the grain takes off surface soot and any raised fibres without touching the engrave itself, which sits below the surface. Then finish it as you would finish any wood, with one thing in mind: the engraved area is more absorbent than the rest of the piece, so oils and penetrating finishes will darken it more, and a film finish will pool slightly in a deep engrave. Both are usually desirable. A wipe-on or spray finish reaches into an engraved recess more evenly than a brushed one. For items that will be handled — coasters, boards, tags — a sealed surface also stops the engrave picking up dirt and going muddy over time. Boss publishes no finishing schedule for engraved wood, so every product choice here is ordinary woodworking practice; test it on a scrap of the same stock, especially over a deep engrave where a finish behaves differently from on a flat board.
Sources
The power, speed and scan-gap figures are transcribed from Boss’s own BL2-T83 CO₂ material settings charts (70 / 105 / 155 W tiers) — first-party Boss data. The species, grain, contrast, surface-preparation and air-assist guidance comes from Boss’s Laser Wood Engraving application document and the Boss HP Series User Manual, which is also the source for the refocus rule and the USB test files. Items marked † — finishing schedules, wash coats, paint fill and post-engrave darkening — are ordinary woodworking craft with no Boss-published procedure behind them, and are labelled as such rather than dressed up as specification.
Still deciding?
Bring us the piece you want to repeat a hundred times.
Species, size, how much of the surface gets engraved and how many a week. Engraving is a bed-size and consistency question far more than a wattage one, and a specialist will tell you when the cheaper machine is the right one.