
A photograph has thousands of tones. Wood has about four.
Everything that makes photo engraving hard follows from that sentence. The image on your screen carries a huge range of brightness; a laser on wood can produce unengraved pale timber, a light scorch, a mid brown and a dark carbonised brown — and the grain of the board is already drawing its own picture underneath yours. Photo engraving is the craft of compressing one into the other and choosing what to lose.
Photographic and greyscale artwork on wood and plywood — stock choice, what the material does to an image, and what to expect.
Dithering, DPI, greyscale mapping and file formats are handled in depth in the Artwork & Greyscale guide.
The one thing worth knowing before anything else
This is the one wood application where the file matters more than the machine. Two shops with identical lasers and identical settings will produce very different plaques from the same photograph, because almost all of the quality was decided in the image before it reached the bed. A better machine engraves a badly prepared photo faster. It does not rescue it.
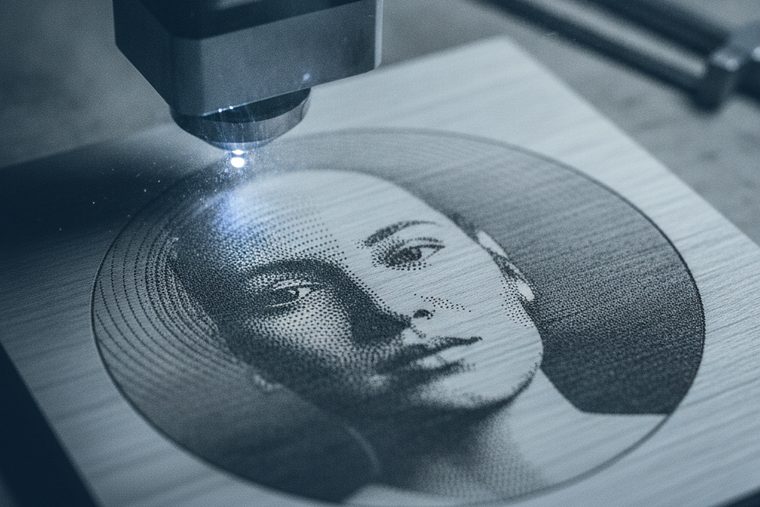
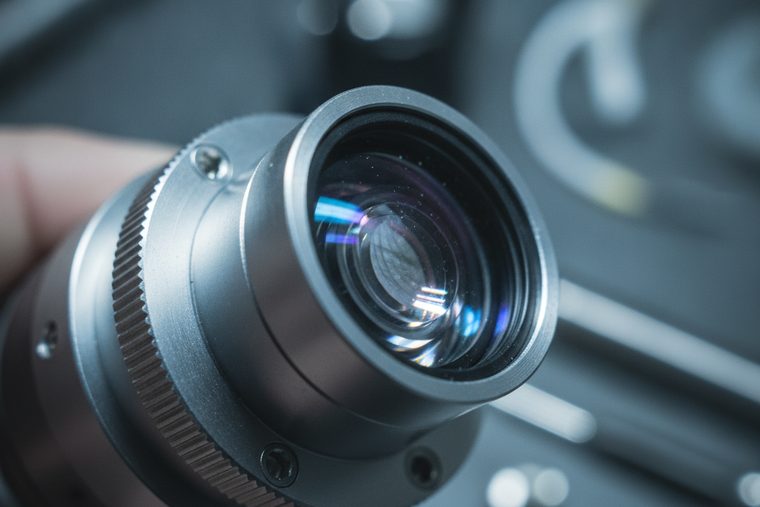
Any Boss CO₂ will do this. What helps is a short-focal-length lens for a smaller spot, and a machine you can repeat a setting on.
Size a CO₂ System- 1 · Choose the board for the photograph, not the other way round. Pale, tight, even grain. Anything with figure is a competing image.
- 2 · Prepare the image for a four-tone medium. Crop hard, raise contrast, and convert tone into dot density — dithering is the usual answer on wood, because wood’s response to power is neither linear nor uniform across the board. The Artwork & Greyscale guide covers the dithering, DPI and file-format decisions properly.
- 3 · Run a test tile on the same stock. Not a test square — a strip of the actual image at three or four settings, so you can see what happens to faces and shadows rather than to a grey patch.
- 4 · Engrave at low power and high speed. Photo work lives at the gentle end of the scale. Boss’s published starting points for basswood and birch are 35% / 25% / 20% power at 350 mm/s on the 70 / 105 / 155 W tiers; for photographs most shops end up at or below that, because the whole game is holding the light tones.
- 5 · Finish the surface. A light sand and a wipe-on finish lift the contrast noticeably and stop the engrave picking up dirt.
Pale, close-grained stock — basswood, maple, alder, and good birch plywood. Uniform colour means the tonal range of the engrave is the only thing the eye sees.
Oak, ash and anything with strong figure. The grain has more contrast than the photograph does, so the image reads as a pattern on a pattern.
Dark species — walnut, cherry. The engrave is dark and so is the board, so you lose the top half of the tonal range before you start.
The plywood trap worth knowing about
Birch plywood is a popular substrate for photo work — flat, pale, cheap and consistent — but its face veneer is thin. Engrave hard enough to hit your darkest tone and the deepest passages can reach the glue line beneath, which shows up as a distinctly different colour and texture in exactly the shadows you were trying to strengthen. If a plaque keeps going odd in the dark areas, that is usually what happened, and the answer is a lighter setting plus a higher-contrast image, not more power. Solid stock has no glue line to find.
A laser-engraved photograph on wood is a monochrome brown image with a compressed tonal range and a visible dot structure. Held at arm’s length on the right board it is genuinely striking. Held at reading distance and compared with the photo on a phone, it will always lose — and the person who commissioned it will do exactly that comparison. Two habits prevent almost every argument: show a physical sample before taking the order, and choose source photographs that already suit the medium.
A clear subject, strong separation from the background, good existing contrast, and detail that survives at the finished size. Portraits with directional light. Buildings. Pets against plain backgrounds.
Busy backgrounds, low-contrast or hazy originals, very dark or very light subjects, small faces in group shots, and anything where the meaning lives in colour rather than tone.
Size is part of the resolution
The dot structure that carries the image has a physical size set by the beam spot and the scan gap, so an image reproduced small has fewer dots available to describe a face. Shrink a portrait too far and the eyes turn into a smudge no setting recovers. If a piece has to be small, crop tighter rather than scaling down — a head-and-shoulders at 4″ will always beat a full-length figure at 4″. Where fine detail is the point, a shorter focal-length lens gives a smaller spot and holds more of it, at the cost of a shallower depth of field; the lens and field-size guide covers that trade.
Photo engraving FAQs
Questions people ask about engraving photos on wood.
The file-preparation questions are answered in depth in the Artwork & Greyscale guide; these are the ones about the wood.
QHow do you laser engrave a photo on wood?
Treat it as a printing job onto an unusual paper. Choose the board first — pale, tight and even-grained, because figure competes with the image. Prepare the photograph for a medium with roughly four usable tones: crop tight, raise contrast, and convert continuous tone into dot density, which is what dithering does and why it is the normal choice on wood. Prove it on a test tile of the same stock, engraving a strip of the actual image at several settings rather than a grey square, so you can see what happens to faces and shadows. Engrave at the gentle end — low power, high speed — because photo work is about holding the light tones, not maximising the dark ones. Then sand lightly and finish, which lifts the contrast more than most people expect. Boss’s published basswood and birch engraving points (35% / 25% / 20% at 350 mm/s, 0.065 mm scan gap on the 70 / 105 / 155 W tiers) are a sensible place to start testing from.
QWhich wood photographs best?
Pale and boring. Basswood, maple, alder and good birch plywood are the usual choices, because a uniform, light background gives the engrave the widest tonal range to work in and adds no pattern of its own. Oak and ash are difficult — their grain has more contrast than most photographs do, so the image reads as two pictures fighting. Dark species like walnut and cherry are hardest of all: the engrave is brown and the board is brown, so the top half of the range is gone before you start, and a portrait ends up as a silhouette. If a customer insists on dark stock, the honest alternatives are to cut the image from a pale veneer and inlay it, or to change what the piece is. None of this is about machine capability; it is about how much contrast the material can physically provide.
QWhy do the dark areas of my photo come out blotchy?
Two causes, and they need opposite fixes. If the blotching follows the grain — darker in bands that run the length of the board — the beam is removing more of the soft early growth than the hard late growth, and no setting corrects it. Change to a tighter-grained board. If the blotching sits in the deepest shadows only and looks like a different material rather than a darker one, you may have engraved through a plywood face veneer to the glue line beneath, which does not scorch the way wood does. Back the power off and get the contrast from the image instead. There is also a third possibility worth ruling out first, because it is free: past a certain power the engrave stops darkening and starts throwing a smoky halo that pools unevenly in dense areas. If your darkest passages look muddy and slightly enlarged, you are over the ceiling — go down, not up.
QHow small can a laser-engraved photo be?
Smaller than you think for a simple subject, and larger than you think for a face. The image is carried by a dot structure whose size is set by the beam spot and the scan gap, so shrinking the artwork does not shrink the dots — it just gives the picture fewer of them to describe the same detail. A portrait reproduced too small loses the eyes first, and nothing in the settings brings them back. The practical move is to crop rather than scale: a head-and-shoulders at 4″ will always beat a full-length figure at 4″. Where fine detail genuinely matters, a shorter focal-length lens produces a smaller spot and holds more of it, with a shallower depth of field as the trade — which is fine on a flat plaque and less fine on anything that is not perfectly level.
QHow long does a photo engraving take to run?
Longer than anything else on this page, because a photo is a filled engrave: the head has to traverse every line of the whole image area, not just follow an outline. The time is driven by three things you control — the physical area being engraved, the scan gap, and the speed. Halving the scan gap for a smoother result roughly doubles the passes and therefore the time. A small plaque is minutes; a large filled panel at fine spacing can be an hour or more. This is the clearest place where wattage pays for itself: a higher-power machine reaches the same tone at a higher speed, so the same picture comes off the bed sooner. If photo work is going to be a production line rather than an occasional job, that is the argument for the bigger tube — not the ability to make a darker image.
Sources
The power, speed and scan-gap figures are transcribed from Boss’s own BL2-T83 CO₂ material settings charts (70 / 105 / 155 W tiers) — first-party Boss data. The species, grain and contrast behaviour comes from Boss’s Laser Wood Engraving application document; the refocus rule and the USB test files from the Boss HP Series User Manual. Everything on this page about image preparation, dithering and expectation-setting is craft rather than specification, and the detail behind it lives in the Artwork & Greyscale guide. Boss publishes no photo-engraving procedure or settings chart, which is why no number here is presented as one.
Still deciding?
Send us the photograph you would want to sell.
Tell a specialist the finished size, the stock you have in mind and how many a week. Photo work is the application where the honest answer is most often about the file and the board rather than the machine — and we would rather say so up front.