
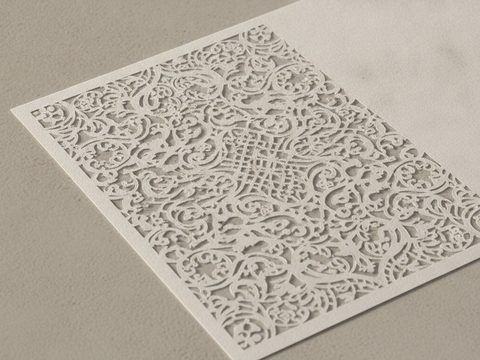
CO2 · fiber
Material, kerf, bridges
Operator → designer
Islands falling out
Stencils are simple in principle and unforgiving in three specific ways. Kerf: the beam removes real width, so apertures come out larger than drawn and islands smaller — compensate by offsetting artwork. Taper: the beam isn’t a perfect cylinder, so an aperture can be slightly wider on one face than the other, which matters when paste or paint has to release cleanly. Bridges: every closed counter — the middle of an O or an A — will fall out unless artwork ties it back with deliberate uncut connections. Material follows use: Mylar for reusable general work, Kapton or thin stainless for electronics, card for one-offs.
1 · Choosing the material.
| Material | Best for | Notes |
|---|---|---|
| Mylar / polyester film | Reusable general-purpose stencils, signage, craft, painting | The default. Flexible, wipes clean, cheap. Thin gauges cut crisply |
| Polyimide (Kapton) | Electronics, solder paste, heat-exposed work | Holds fine apertures; tolerates heat far better than most films |
| Thin stainless steel | Production solder-paste printing | Dimensionally stable and durable over many cycles — a fiber job, not CO2 |
| Card / heavy paper | Single-use, prototyping, decorative | Cheap and fast; won’t survive wet media or repeated use |
| Thin acrylic | Rigid stencils, repeated positioning | Rigid and durable, but thickness works against fine detail |
| Thin aluminium | Durable industrial stencils | Rigid and long-lived; fiber laser |
The choice mostly answers three questions: how many times will it be used, how fine is the finest feature, and what medium goes through it (solvent, paste, paint, abrasive).
2 · Kerf — why apertures come out oversize.
The beam removes a finite width of material. Cut a 5 mm square hole and the hole is slightly larger than 5 mm; cut a 5 mm island and it comes out slightly smaller. Coarse work never notices. Fine stencil work notices immediately, because aperture size is exactly what governs how much medium passes.
How to compensate properly
Don’t guess the kerf from a spec — it varies with material, thickness, focus and settings. Cut a test piece, measure the actual aperture against the drawing, and offset your artwork by half the difference on each edge. Most CAD and CAM packages do this as an offset or “kerf compensation” parameter. Do it once per material and thickness and record it — it’s stable as long as your setup is.
3 · Taper — the aperture isn’t a straight-sided hole.
A focused beam converges to a waist and diverges again, so the cut isn’t a perfectly parallel slot. Depending on focus position relative to the material, an aperture can end up marginally wider on one face than the other.
For paint stencils this is irrelevant. For solder-paste stencils it matters a great deal: a slight taper that’s wider on the underside actually helps paste release cleanly, and the wrong way round makes release worse. If you’re producing paste stencils, know which face is which and mark it.
4 · Bridges and islands — the thing that ruins first attempts.
Every closed shape has an inside. The counter of an O, the triangle inside an A, the two holes in an 8 — each is an island of material whose outline is fully cut. The instant the cut completes, that island has nothing holding it and it drops out.
The fix is bridges: small deliberate uncut connections tying each island back to the surrounding material.
- Stencil fonts have bridges built in. If you’re cutting text, use one — it’s the entire reason they exist.
- For custom artwork, add them yourself. Place bridges where they’re least visually intrusive and where the medium won’t pool against them.
- Size them for the material. Too thin and they tear in handling; too thick and they show badly in the print.
- Check every closed path before cutting. Fast visual pass, saves the whole piece.
5 · Cutting practice.
- Hold thin stock flat. Film lifts under air assist and extraction, which ruins registration and can flap into the beam. Honeycomb bed with magnets outside the cut area, or a vacuum bed. Thin-stock handling →
- Less power than you’d think. Excess power widens the kerf, which fights your aperture accuracy.
- Cut interior apertures before the outer profile — cut the outline first and the piece can shift, losing registration on everything after it.
- Mind the fire risk on card and film. Air assist and extraction running, machine attended.
- Never cut vinyl stencil material. Much self-adhesive stencil film is vinyl — PVC — and belongs nowhere near a laser. Why →
6 · Where stencils earn their place — and where they don’t.
They’re good at repeating the same mark many times cheaply, applying media to awkward or large surfaces, and giving consistent results without skilled freehand work. Electronics paste printing, signage and wayfinding, industrial part marking, textile printing, and decorative work all lean on them.
They’re limited by the bridge problem (some designs simply can’t be stencilled without visible ties), wear (film stencils degrade with use and cleaning), single-purpose-ness (a stencil does one design), and detail limits (below some feature size the apertures stop being reliable). For one-off complex artwork, direct laser engraving or printing is usually the better answer.
7 · FAQs
Frequently asked
Laser-Cut StencilsQWhat material for laser-cut stencils?
Mylar or polyester film for reusable general work, Kapton or thin stainless for electronics and solder paste, card for single-use, thin acrylic or aluminium where rigidity matters.
QHow does kerf affect stencils?
The beam removes real width, so apertures come out larger than drawn and islands smaller. Cut a test piece, measure, and offset artwork by half the difference per edge.
QWhy do parts fall out?
Closed counters — the middle of an O, A or 8 — have nothing holding them once cut. Artwork needs bridges: small uncut connections. Stencil fonts include them.
QCan you cut metal stencils?
Yes — thin stainless is standard for production solder paste. That’s a fiber laser job, since bare metal reflects the CO2 wavelength.
8 · Related in this series.
Part of Processes & Techniques:
- Cutting vs. engraving — stencils are vector work
- Kapton, Mylar, cork & paper — the stock itself
- What must never go in a laser — vinyl stencil film
Keep exploring
One idea leads to the next.
The right process is usually a bigger win than the right settings. Follow the rest of the series, or talk it through with someone who runs these systems.